Don’t Let Wires Win: A Beginner’s Guide to Bike Wiring
Jul 25th 2025

A Straightforward Guide to Getting Your Connections Right
Wiring your motorized bike engine can be one of the most unexpectedly tricky parts of the build. Especially if you're not familiar with basic electrical systems. Even if you’re mechanically inclined, wiring can sometimes throw you a curve ball. This guide is designed to walk you through the process clearly, without unnecessary jargon, so you can get your bike up and running with confidence.
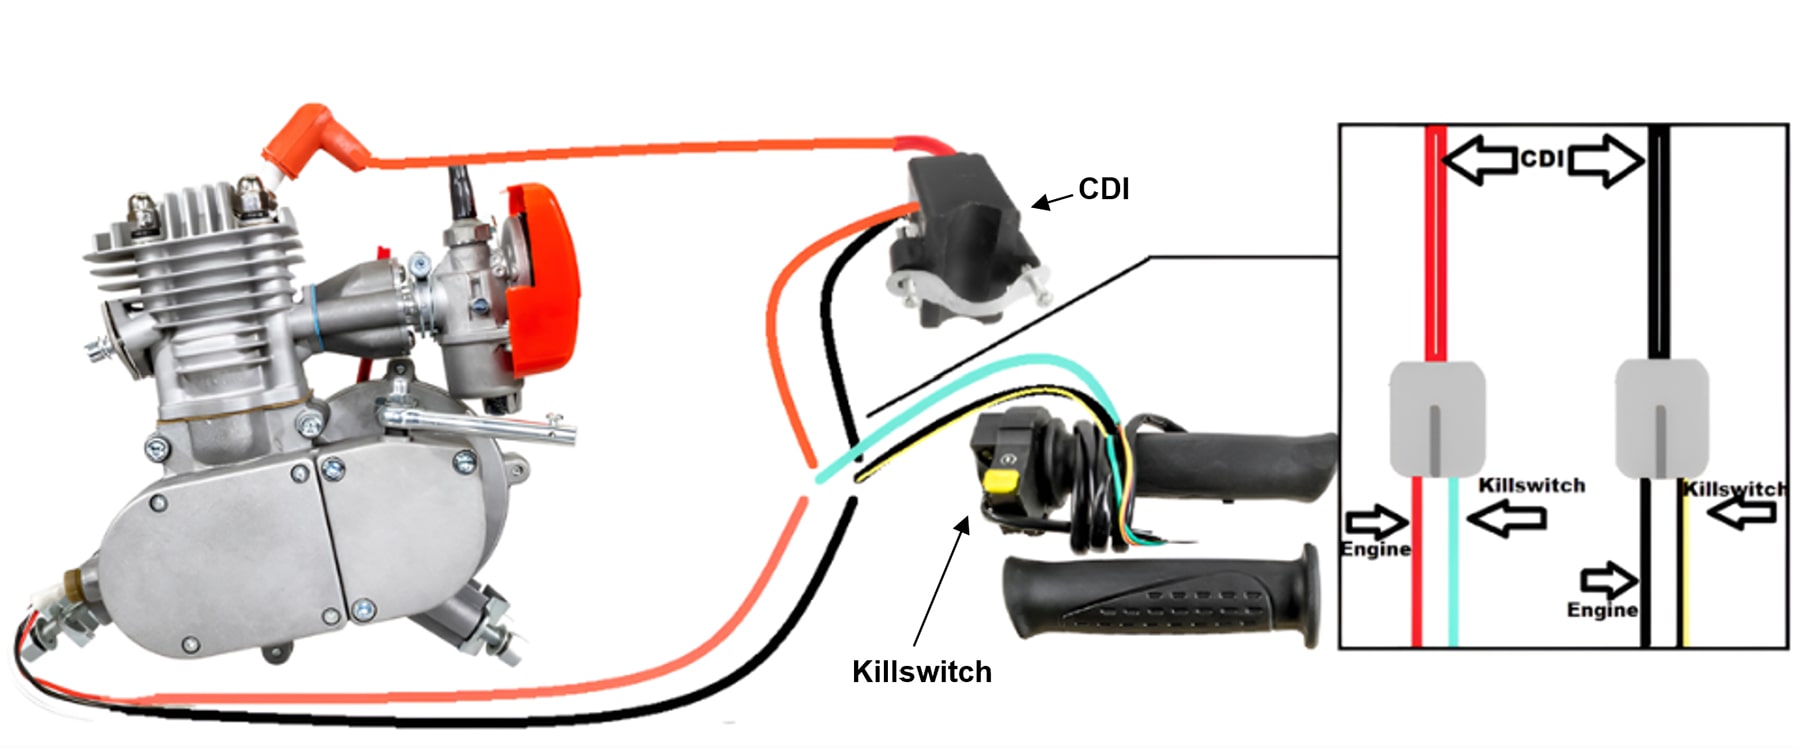
Match Wire Colors for a Reliable Connection
While wire colors may vary slightly depending on the engine model or production year, the general rule of thumb is simple: match black to black, and color to color. This basic method typically works across most 2-stroke engine kits and helps avoid confusion or crossed wires.
If you’re using the included CDI unit, you’re in luck. This CDI is equipped with double-ended bullet connectors, eliminating the need for wire strippers or soldering. Just connect the engine wires to the CDI and your kill switch, and you’re already halfway done.
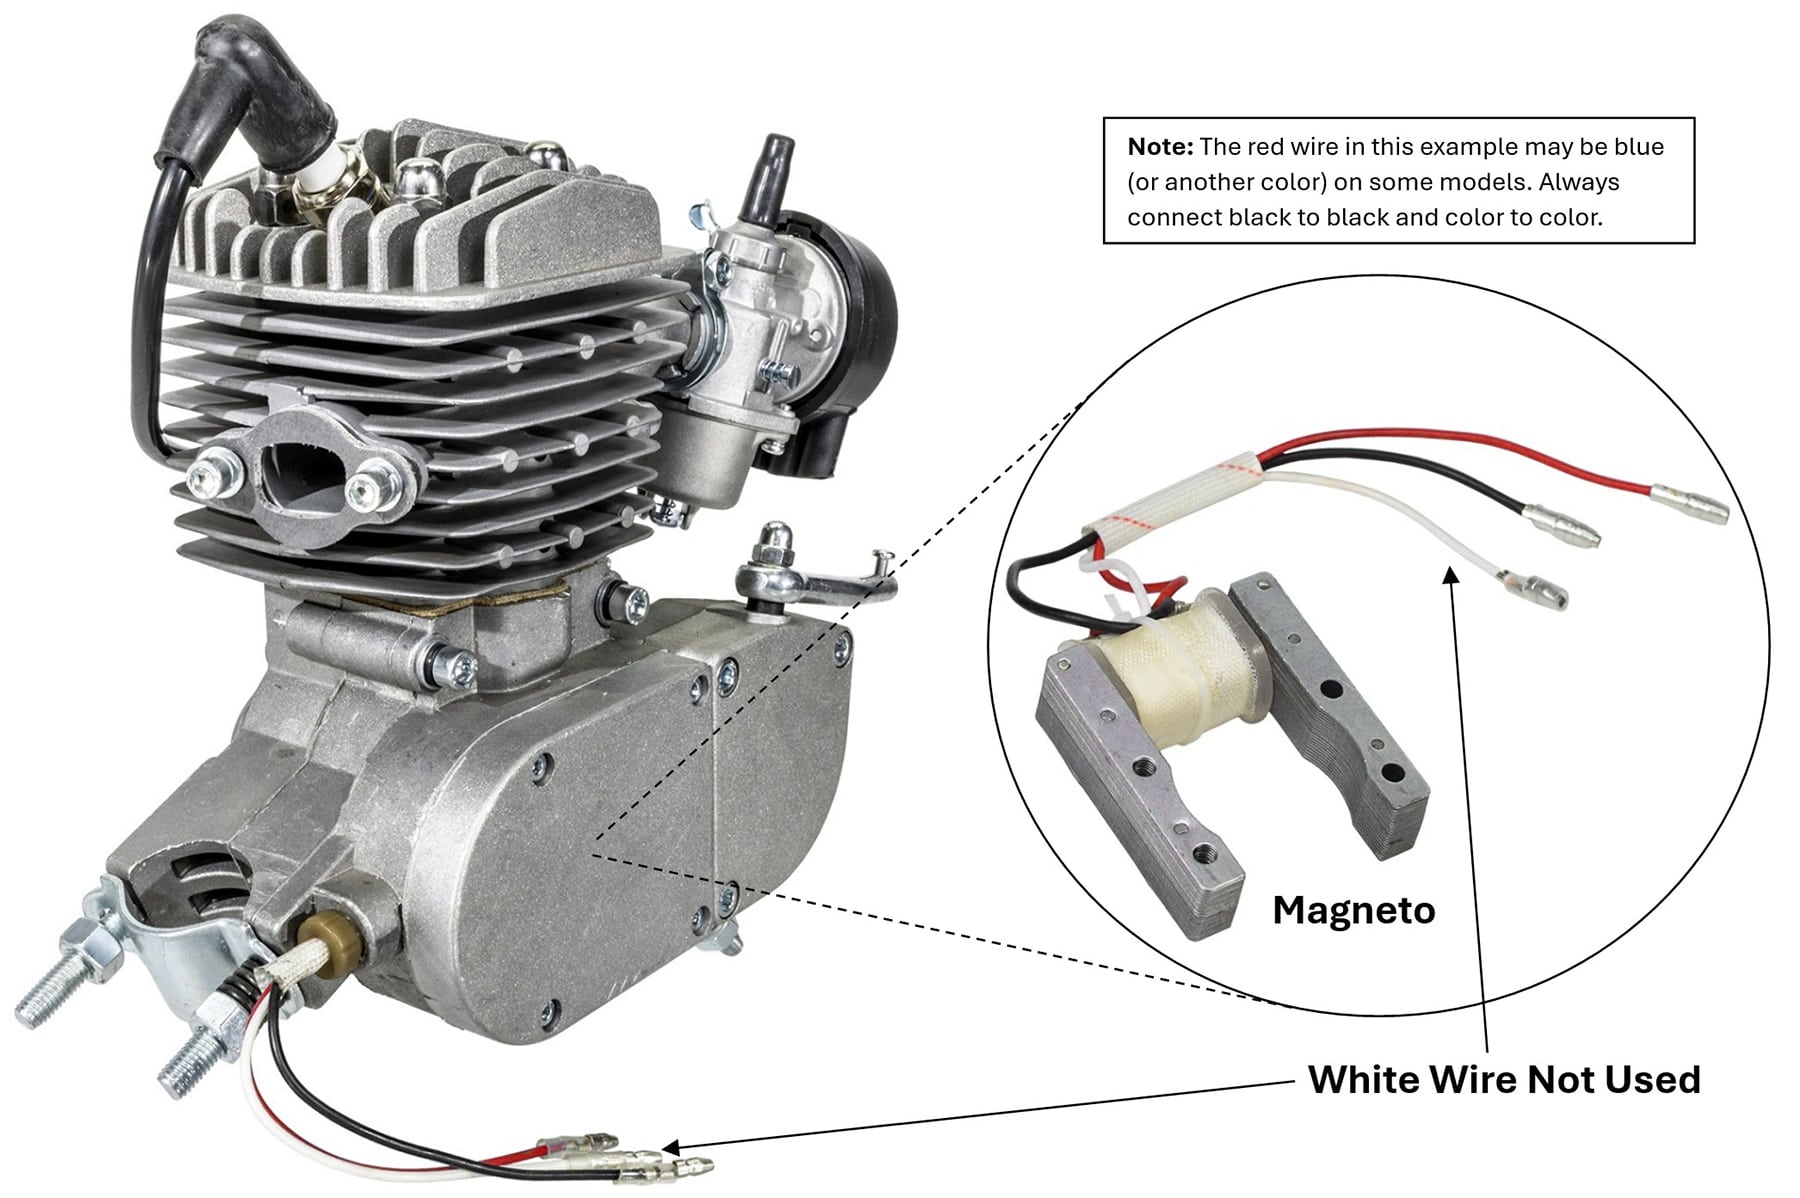
The White Wire – Why You Should Ignore It
Some bicycle engine magnetos include a white wire that looks important but serves no functional role in most modern builds. This wire was once intended for auxiliary power (like a headlight), but in practice, it draws voltage from the ignition circuit and weakens spark performance.
Unless you’re building a custom electrical system, the best practice is to cut, tape, and tuck the white wire safely out of the way. If left exposed, it could short out your ignition if it touches metal or becomes wet.
Understanding How the Kill Switch Actually Works
The kill switch doesn’t “turn off” the engine in the traditional sense. Instead, it grounds the CDI unit’s ignition signal, cutting spark production and stopping the engine. It’s a simple but effective circuit-break method—but it’s not immune to issues.
Because the kill switch wiring is often exposed to the elements, moisture can create unintended shorts or corrosion inside the switch. This can lead to starting issues. In some cases, this damage can prevent the engine from shutting off properly.
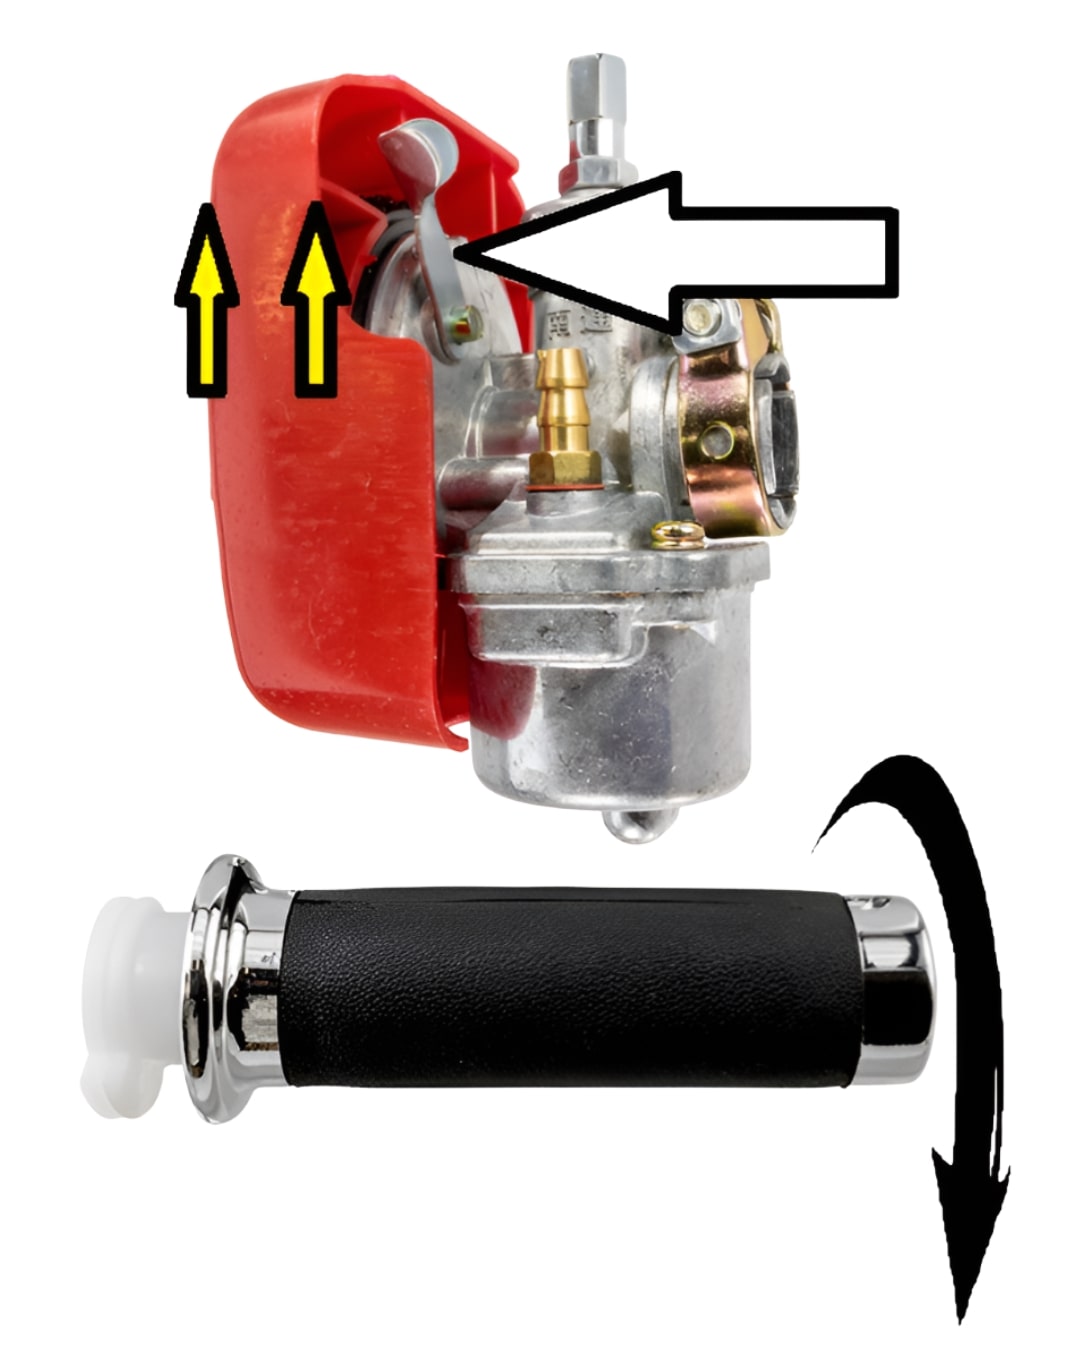
What to Do If the Kill Switch Fails
If your kill switch becomes unresponsive, there’s a backup method to shut down the engine safely: flip the choke lever up and apply a small amount of throttle. This enriches the fuel mixture and smothers the spark, stalling the engine.
Note: This method may make the bike slightly harder to start on the next attempt due to excess unburned fuel in the cylinder. However, it’s a safe and effective emergency shutdown technique.
Keep Wiring Clear of Heat and Moving Parts
Proper wire routing is critical. Always secure wiring away from high-heat areas like the exhaust pipe and cylinder head. Contact with hot surfaces can melt insulation, cause shorts, and potentially damage the CDI unit or magneto.
Use zip ties or heat-resistant sleeves to guide wires along the frame and away from vibration or pinch points. Neat, intentional placement isn’t just about looks—it’s essential for long-term reliability.
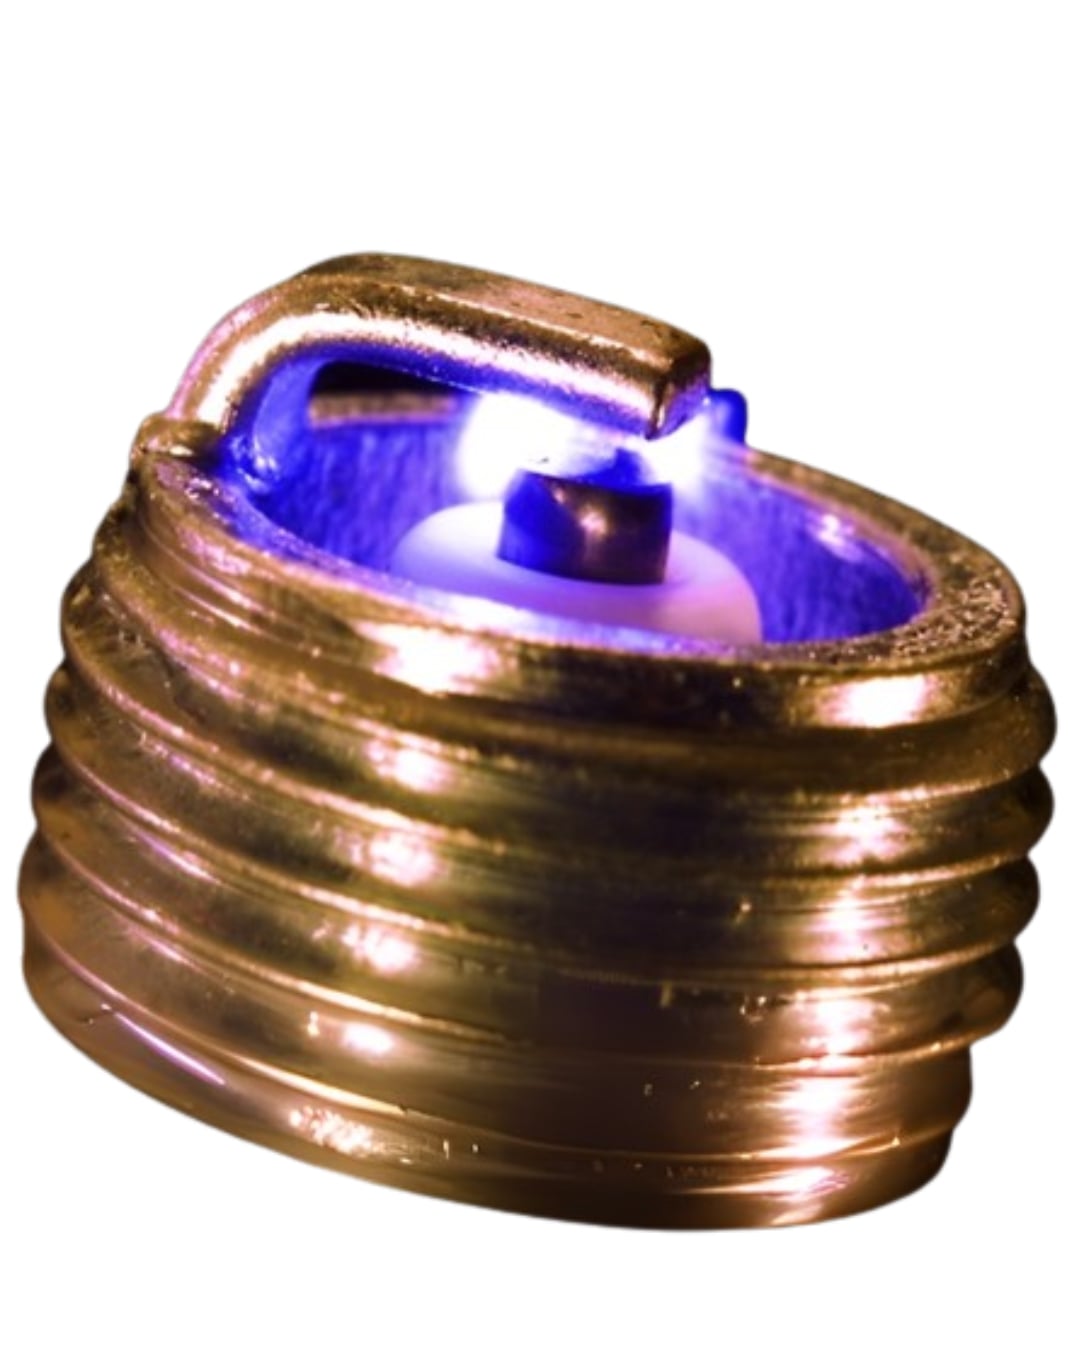
How to Perform a Spark Test
Once all wiring is connected, it’s time to verify your setup by testing for spark. Here's how:
- Remove the spark plug from the engine.
- Keep it connected to the CDI via the plug wire.
- Touch the metal threads of the spark plug to the engine head (grounding it).
- Roll the bike forward with the clutch engaged to rotate the crankshaft.
You should see a strong, consistent spark at the plug’s gap—ideally blue or purple in color. For optimal ignition performance, the spark plug gap should be set between .028 and .030 inches using a gap tool.
You’re Ready to Ride
Wiring your motorized bike doesn’t have to be a guessing game. By following this guide and double-checking your connections, you’ll avoid the most common electrical issues that stall out new builds.
Still running into trouble? Contact our support team at 406-586-5970 from 7am to 5pm M-F—we’re happy to walk you through your setup and help troubleshoot anything from wiring diagrams to startup issues.